

 Canada (en)
 Germany (de)
 Austria (de)
 France (fr)


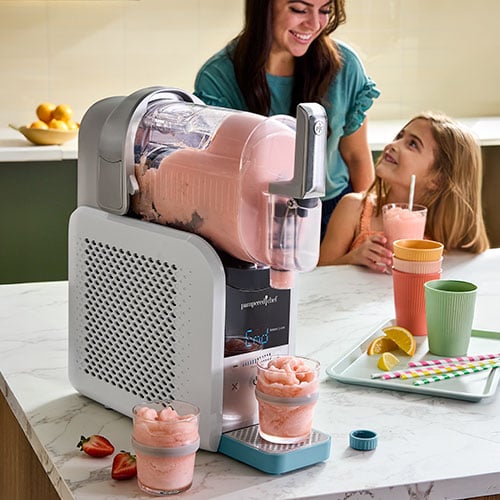


FreezyFun Ultimate Frozen Drink & Soft-Serve Maker

FROSTY FUN IN EVERY SIP
Make frozen treats your way at home! The FreezyFun Maker is your shortcut to chill treats without all the fuss. Whether you’re craving a frozen lemonade, creamy soft serve, or a slushie with alcohol, this small appliance can do it all with simple, everyday ingredients that you choose!
You can turn simple ingredients (or even a single ingredient!) into icy slushies, homemade soft serve, or delicious frozen drinks in 15–60 minutes. Add pureed berries to lemonade, use your favorite regular soda, or mix juices to create slushies you’ll feel good serving to your family.
There are eight presets (including a wash cycle). Just add your ingredients to the tank, select your preset, and let the machine do all the work while you enjoy special moments with family and friends. Each preset will keep treats at a consistent temperature for up to 12 hours, ensuring your drinks will stay cold and slushy all afternoon—and evening. Perfect for everyday fun or making celebrations even sweeter!
When it's time for cleanup, the wash preset is all you'll usually need because it agitates to rinse out the tank. If you need a deeper clean, most of the accessories can go right in the dishwasher. Ingredients with a lot of citric acid or intense colors may cause clouding or staining. These effects are cosmetic only and don't affect product functionality.
Due to the coolant in this product, it's not available for shipping to Alaska, Hawaii, or APO/FPO addresses.
Why You’ll Love It
- Uses simple ingredients and is simple to use!
- Make delicious frozen drinks with ingredients your family loves.
- Includes a wash cycle for easy cleanup
GUARANTEE
- 2-year guarantee
Product Details
- Includes a Filling Chute, Dispensing Handle, Dispensing Spout, Cool Barrel, Tank, Condensation Tray, Auger, Drip Tray Cover, Drip Tray, Soft-Serve Tip, and Start Guide
- Settings for: Soft serve, slushie, spiked slush, frappe, milkshake, frozen juice, chilled drink, wash, and customizable thickness
- Tank, Condensation Tray, Auger, Drip Tray, Drip Tray Cover, and Soft-Serve Tip are dishwasher-safe
- Fits neatly under cabinets: 16.5" x 6.26" x 17.25" (42 cm x 16 cm x 44 cm)
- 8-cup (64 fl. oz/1.9 kg) capacity
- Made of ABS plastic (outside panels), POM plastic (Auger), and stainless steel
- 220 watts
- About 23 lbs. (10.4 kg)
WAYS TO USE
Check out this article to find One-Ingredient Wins and Two-Ingredient Twists for the FreezyFun Ultimate Frozen Drink & Soft-Serve Maker.
And, here are our favorite getting started tips: Top Tips to Become a FreezyFun Phenom.
-
Use & Care
Use & Care
Use & Care
SAFETY AND USE INSTRUCTIONS
When using electrical appliances, basic safety precautions should always be following, including:
WARNING
- 1. Read all instructions.
- 2. This appliance is not intended for use by persons (including children) with reduced physical, sensory, or mental capabilities, or lack of experience and knowledge, unless they are closely supervised and instructed concerning use of the appliance by a person responsible for their safety. Close supervision is necessary when any appliance is used by or near children.
- 3. Children must be supervised to ensure that they DO NOT play with the appliance.
- 4. DANGER: There is a risk of fire or explosion due to flammable refrigerant. DO NOT puncture the refrigerant tubing. If you ever dispose of this product, do it in accordance with the applicable federal or local regulations pertaining to flammable refrigerant.
- 5. DO NOT operate unattended.
- 6. Avoid contact with moving parts. Keep your hands, hair, clothing, and utensils away from the moving parts to reduce risk of injury and/or damage to the appliance.
- 7. If the appliance, cord, or plug has been damaged in any manner, immediately discontinue use of the appliance. For any questions, call the Solution Center at (888) 687-2433 (United States) or (800) 342-2433 (Canada).
- 8. Unplug the appliance from outlet when not in use to prevent accidents (such as fire, electrical leakage, failure, etc.) and before cleaning, assembly, and disassembly.
- 9. DO NOT use the appliance for anything other than its intended use. This appliance is only intended for the preparation and serving of frozen beverages and soft serve. It’s not intended for use with any nonfood materials or products.
- 10. DO NOT let the cord hang over the edge of a table or counter.
- 11. DO NOT let the cord or unit touch hot surfaces.
- 12. DO NOT place the appliance or the cord on or near heat sources, a hot gas or electric burner, or in a heated oven.
- 13. DO NOT use outdoors.
- 14. DO NOT microwave the accessories included with this appliance.
- 15. WARNING: DO NOT use electrical appliances inside the compartments of the appliance, unless they are of the type recommended by the manufacturer.
- 16. DO NOT add hot ingredients to the appliance.
- 17. DO NOT submerge the appliance in water or other liquids.
- 18. DO NOT fill the container beyond the maximum fill lines. See p. 7 for more details.
- 19. Before operating, ensure all the utensils are removed from the containers. Failure to remove the utensils can cause the containers to shatter and potentially result in personal injury and property damage. Confirm only the Auger is in the Tank and properly installed before use. See the Assembly section for more details.

20. DO NOT carry the appliance by the Lock Lever or Cool Barrel as they may break. Instead, hold the appliance by grabbing both sides underneath the base. - 21. DO NOT use with hard, loose ingredients or ice. This appliance is not intended to process loose frozen fruit, a block of solid ice, ice cubes, or any solids.
- 22. DO NOT operate the appliance on an unstable or wet surface. Always operate the appliance on a dry, stable, non-combustible, level surface.
23. When handling the appliance, DO NOT turn it upside down or on its side. You must always keep it upright. 
24. When in use, DO NOT place the appliance against a wall, cabinet, or against other appliances. Leave at least 6" (15 cm) of free space on the back and sides of the appliance. Do not store any item on top of the appliance. 
25. DO NOT put foreign objects into gaps and crevices of the appliance. DO NOT insert utensils or other foreign matter into gaps or crevices. This may cause electric shock or other dangerous accidents. - 26. If the freezing solution appears to be leaking from the appliance, stop using the appliance immediately.
- 27. WARNING: Keep ventilation openings (see parts diagram below), in the appliance enclosure or in the built-in structure, clear of obstruction. Doing so may damage the appliance and/or cause it to overheat.
- 28. The use of accessory attachments not recommended by Pampered Chef may cause injuries.
- 29. Make sure the appliance is fully assembled before plugging in and pressing the Power Button. See the Assembly section for more details.
- 30. WARNING: DO NOT use any mechanical devices or other means to accelerate the defrosting process, other than those recommended by the manufacturer.
- 31. DO NOT store explosive substances such as aerosol cans with a flammable propellant in or near the appliance.
- 32. DO NOT move the appliance while its operating. The appliance must be unplugged and emptied before moving.
- 33. DO NOT prefreeze the ingredients. All ingredients should be no lower than 34°F (1°C) as frozen ingredients may cause the Auger to stall.
- 34. WARNING: DO NOT damage the refrigerant circuit. This warning is only applicable for appliances with refrigerating circuits which are accessible by the user.
- 35. This appliance contains an insulation blowing gas. When disposing this appliance, it must be disposed in accordance with local regulations.
- 36. WARNING: When positioning the appliance, ensure the supply cord is not trapped or damaged.
- 37. WARNING: DO NOT locate multiple portable socket-outlets or portable power supplies at the rear of the appliance.
SAFEGUARDS
- 1. This appliance is intended to be used in household and similar applications such as
- a.staff kitchen areas in shops, offices and other working environments;
- b. farm houses and by clients in hotels, motels and other residential type environments;
- c. bed and breakfast type environments;
- d. catering and similar non-retail applications.
2. Clean frequently. Refer to the Cleaning section for proper maintenance. - 3. Be sure the outlet is designated for just this appliance and has nothing else plugged into it.
- 4. Never connect this unit to an external timer switch, smart plug, or separate remote-control system.
- 5. DO NOT store the unit in direct sunlight.
- 6. DO NOT operate the appliance adjacent to or inside sinks and other sources of water.
- 7. Position the appliance away from any overhangs, walls, and table or countertop edges.
- 8. DO NOT insert or remove the plug with wet hands. To avoid injuries due to electric shock, make sure your hands are dry before plugging and unplugging the unit.
- 9. DO NOT interact with the appliance with wet hands.
- 10. DO NOT use an adapter, extension cord, or inverter with this appliance.
- 11. WARNING: Use and clean with safe drinking water only.
- 12. Using any high-acidic foods or foods with dyes/food colorings may cause staining. This is considered normal and doesn’t affect the appliance’s performance.
ELECTRICAL HAZARDS
When using electrical appliances, basic safety precautions should always be followed including the following:
'
1. To reduce the risk of electric shock, this plug will fit in a polarized outlet only one way. If the plug doesn’t fit fully into the outlet, contact a qualified electrician. - 2. Use only with a 120V 60Hz power outlet with a minimum current rating of 15A. Failure to follow can result in electrical shock, fire, or other serious injury.
- 3. To protect against electrical shock, do not immerse the cord, plug, or any part of the unit in water or other liquids. DO NOT pour water on its side or control panel.
- 4. A short power-supply cord is provided to reduce risks resulting from becoming entangled in or tripping over a long cord.
- 5. To disconnect, turn the power off by pressing and holding the Power Button. Then, remove the plug from the wall outlet. Always pull the plug out from the wall; never pull the cord.
- 6. This appliance has important markings on the plug. The entire supply cord isn’t suitable for replacement. If damaged, call the Solution Center at (888) 687-2433 (United States) or (800) 342-2433 (Canada).
- 7. If the plug fits loosely into the outlet, or if the outlet or plug feels warm, DO NOT use that outlet.
ENVIRONMENTAL HAZARDS
- 1. This appliance uses flammable refrigerants. When disposing of this appliance the end of its life, it MUST be recycled separately from other domestic waste.
- 2. It should be disposed of at a selective collection center for electrical and/or electronic appliances. As the user, you’re responsible for taking the appliance to the appropriate collection center.
- 3. For more detailed information about available collection systems, contact your local waste collection organization.
PARTS
A. Filling Chute
B. Tank
C. Dispensing Handle
D. Dispensing SpoutE. Condensation Tray
F. Auger
G. Cool Barrel
H. WellI. Drip Tray Cover and Drip Tray
J. Lock Lever
K. VentsL. Control Panel
M. Soft-Serve Tip
DISPLAY CONTROL PANEL DISPLAY & OPERATING BUTTONS 
1. Power Button: Press to turn the appliance on. Press and hold to turn the appliance off.
2. Presets: Choose from a selection of presets to achieve the perfect temperature and thickness for your frozen creations.
3. Wash Preset: This rinses the appliance without cooling. For a deeper clean, add a small amount of dish soap directly to the water.
4. Thickness Setting: Easily adjust the thickness for your perfect frozen concoction. Press the minus button to decrease the thickness of your frozen drink or press the plus button to increase the thickness of your frozen drink.
5. Cancel Button: Press any time to cancel functions. The screen will default to the Wash preset.
6. Arrow Button: Press to cycle through the different presets.PRESETS
Preset Default Thickness Ideal Capacity
(The thickness level is indicated by the number of bars.)Products to Avoid Using
Note: The following ingredients won’t generate your desired consistency.Soft Serve 12 bars 30 fl. oz. (875 mL) Water Slushie 6 bars 16–64 fl. oz.
(500 mL–1.9 L)Diet sodas, seltzers, and water Spiked Slush 8 bars 16–64 fl. oz.
(500 mL–1.9 L)Pure alcohol, low-sugar or sugar-free cocktails, and water Frappe 4 bars 16–64 fl. oz.
(500 mL–1.9 L)Black coffee, unsweetened coffee, and water Milkshake 4 bars 16–64 fl. oz.
(500 mL–1.9 L)Yogurt drinks, protein drinks, and water Frozen Juice 6 bars 16–64 fl. oz.
(500 mL–1.9 L)Sugar-free drinks and water Chilled Drink 1 bar 16–64 fl. oz.
(500 mL–1.9 L)Wash — 64 fl. oz. (1.9 L) Abrasive cleaners CLEANING
- 1. Clean the appliance thoroughly before and after using it.
- 2. If you’re not using the Wash cycle, you should dispense all the contents. Then, turn the appliance off, unplug it, and disassemble it before cleaning. If you’re using the Wash cycle, refer to the Using the Wash Preset section.
- 3. The Tank, Auger, Condensation Tray, Soft-Serve Tip, Drip Tray, and Drip Tray Cover are dishwasher-safe.
4. Wipe the Cool Barrel and the Well underneath it with a damp cloth. Note: You may need to use a paper towel to soak up any remaining liquid in the Well. - 5. Dry the appliance thoroughly before using or storing it.
- 6. DO NOT use abrasive cleaners like steel wool, scouring powders, or other abrasive materials.
Using the Wash Preset:
This cycle washes the appliance. After using this cycle, you can wash all parts by hand or in the dishwasher to fully clean all parts after every use. For best results, use the wash cycle before disassembling and cleaning all parts.
- 1. Dispense all the remaining frozen drink or soft serve into a container.
- 2. Press the Cancel Button to stop the current preset. The appliance will then default to the Wash preset.
- 3. Add water until it reaches the max fill line (64 oz./1.9 L).
- 4. Press the Power Button to start the Wash preset.
- 5. Allow the water to cycle through until the Tank looks thoroughly rinsed.
- 6. Place a large bowl under the Dispensing Spout. Slowly dispense the water from the appliance into the bowl. Note: Water will come out quickly, so hold the bowl up to the spout or use the Soft-Serve Tip to slow the flow rate of the water.
- 7. Repeat the process if the Tank doesn’t look thoroughly rinsed.
- 8. Press and hold the Power Button to turn the appliance off.
Storing:
- 1. Allow all parts to dry thoroughly before reassembling and/or storing the unit.
- 2. DO NOT wrap the cord around the bottom of the base. Instead, store the unit upright and with all parts fully assembled. Then, bundle the cord and secure it with the included hook and loop fastener.
3. When moving the appliance, lift the appliance by grabbing both sides underneath the base. DO NOT lift or carry the appliance by the Lock Lever or Cool Barrel as they may break. - 4. DO NOT store ingredients inside the Tank.
USE AND CARE
IMPORTANT BEFORE USE
- Before first use:
- • Remove all packaging. Make sure all parts are present and accounted for.
- • Read all instructions in this document.
- • Clean all parts. See the Cleaning section for instructions.
- • Place the unit on a counter for at least 2 hours before operating. This allows the refrigerant to settle for safe use and optimal results.
- • For any questions, call the Solution Center at (888) 687-2433 (United States) or (800) 342-2433 (Canada).
INITIAL TEST RUN
- 1. Assemble the appliance by following the Assembly and Use sections below.
- 2. Insert the plug into a power outlet.
- 3. Press the Power Button to turn the appliance on.
- 4. Use the Arrow Button to scroll until the Wash preset flashes.
- 5. Use the Filling Chute to add 64 oz. (1.9 L) of water to the Tank.
- 6. Press the Power Button to start the Wash preset.
- 7. After 2 minutes, press the Cancel Button to stop the Wash preset.
- 8. Place a large bowl under the Dispensing Nozzle and use the Dispensing Handle to dispense the water.
- Note:
- • You’ll need a minimum of 16 oz. (500 mL) of liquid to use the appliance except for the Soft Serve preset.
- • You can add up to 64 oz. (1.9 L) of liquid for any preset except the Soft Serve preset. Note: Refer to Pampered Chef recommended recipes for this setting.
- • The ideal liquid capacity when using the Soft Serve preset is 30 oz. (875 mL).
- • DO NOT add ice or solid ingredients like fruit, ice cream, or frozen fruit to the appliance.
- • DO NOT add hot ingredients to the appliance.
- • WARNING: Review all warnings at the beginning of this use and care before proceeding. Failure to follow safety information may result in serious injury or property damage.
How to Assemble and Use:
1. Install the Auger by sliding it over the Cool Barrel and turning it until it fits into place and onto the pin in front. 
2. With the Dispensing Handle facing you, attach the Condensation Tray by aligning the notches on the Tank with the slots on the Condensation Tray. Slide the Condensation Tray toward you until it’s secure. 
3. With the Lock Lever up, slide the vessel over the previously installed Auger and Cool Barrel. Then, push the Tank into place by putting one hand on the back of the appliance and the other on the front of the Tank. 
4. Push down the Lock Lever all the way. 
5. Place the Drip Tray Cover on top of the Drip Tray and insert the Drip Tray into the front of the appliance until it clicks into place. 6. Plug the appliance in. 
7. If you’re making soft serve, add the Soft-Serve Tip by aligning the notches of the Soft-Serve Tip with the slots on the Dispensing Spout. Then, push up and turn it counterclockwise until it’s in place. 8. Turn the appliance on by pressing the Power Button. Then, scroll to your desired preset with the Arrow Button. Press the Power Button again to start your chosen preset. 
9. Once the Auger starts moving, pour your liquid into the Tank with the Filling Chute. Close the chute when you’re done. 
10. When your frozen drink or soft-serve mixture is done, the unit will beep and the display will read, “End.” 
11. Place a container under the Dispensing Spout and pull the Dispensing Handle to dispense. Note:
- • The appliance will continue to run after a cycle finishes to keep your frozen drink at the ideal temperature, so it’s always ready to dispense. To prevent your mixture from overfilling, dispense frequently.
- • It can take 15–60 minutes to make your frozen drink or soft serve depending on the preset, ingredients, liquids, and temperature. Smaller servings will slush faster than larger servings.
- • The appliance will continue to run for up to 12 hours except when you’re using the Wash preset. After it’s been running for 12 hours, it will beep and automatically shut off.
How to Disassemble:
1. Before disassembling, use the Dispensing Spout to empty all the remaining contents from the Tank into another container. 2. Turn the appliance off by pressing and holding the Power Button. Then, remove the plug from the power outlet. 
3. Unlock the Tank by lifting up on the Lock Lever and gently removing it from the appliance. Tip the Tank downward to prevent any remaining liquid from spilling out the back of the Tank. 
4. Remove the Condensation Tray from the Tank by holding the Tank with the Dispensing Spout facing away from you. Then, slide the Condensation Tray toward you. 
5. Slide the Auger off the Cool Barrel. 
6. Remove the Drip Tray by sliding it out from under the appliance. Then, remove the Drip Tray Cover by lifting it off the Drip Tray. 
7. Wipe the Cool Barrel and the Well underneath it with a damp cloth. Note: You may need to use a paper towel to soak up any remaining liquid in the Well. 8. See the Cleaning section for more info. Helpful Tips:
- • Premixed ingredients will taste sweeter. However, once the mixture reaches the desired thickness and temperature, it’ll taste less sweet.
- • Recipes must include at least 4% sugar without artificial sweeteners. DO NOT use diet sodas. They won’t achieve the desired consistency.
- • When using the Spiked Slush preset, all premade liquids must contain 2.8–16% alcohol.
- • For best results, chill the liquid(s) or blended ingredients before adding it to the appliance.
- • For the frostiest results, chill serving glasses before dispensing your frozen drinks in them.
- • Use the minus and plus buttons to adjust the thickness of your frozen drink to your preference.
- • When using the Milkshake or Frappe preset, dispense contents within 30 minutes of the preset ending to avoid a foamy output.
- • For the best dispensing experience, fill the Tank to the recommended fill line for the preset you’re using.
- • For best results, enjoy your frozen drink immediately after the cycle ends.
- • Use whole milk for the best soft-serve results.
Resetting the Motor:
- Resetting the Motor: 1. This appliance features a unique safety system that prevents damage to the appliance should it inadvertently become overloaded. If the appliance is overloaded, the motor will become temporarily disabled. Follow this reset procedure:
- a. Unplug the appliance from the electrical output.
- b. Allow the appliance to cool for approximately 15 minutes. c. Dispense all contents.
- d. Remove all parts and accessories.
- e. Ensure no ingredients are jamming the Auger.
- 2. IMPORTANT: Ensure the maximum capacity is not exceeded. This is the most typical way for an overload to occur.
- a. DO NOT use the appliance to process a solid block of ice or ice cubes.
- b. DO NOT use the appliance to make a smoothie or process hard, loose ingredients.
SUGAR GUIDELINES
When using this appliance, refer to the drink/liquid nutrition label to ensure the sugar content meets the recommended guidelines below.
Serving Size Minimum Total Sugar Amount 8 fl. oz. (250 mL) 8g 12 fl. oz. (375 mL) 11 g 20 fl. oz. (600 mL) 18 g Follow this rule: For every 8 ounces of liquid, you’ll need roughly 8 grams of sugar.
- Note:
- • Prefrozen ingredients will taste sweeter. However, once the mixture reaches the desired thickness and temperature, it’ll taste less sweet.
- • Not enough sugar or too much alcohol will prevent your drink from freezing or slushing. For that reason, all mixes must contain at least 4% sugar to achieve the desired results
IMAGE
- • Sugar-free substitutes and artificial sweeteners won’t aid in meeting the total necessary sugar requirements.
HARD ALCOHOL & SPIRIT GUIDELINES
When making frozen cocktails, refer to this chart for the maximum hard alcohol/spirit content for total recipe size.
Serving Size Maximum Alcohol Amount 2 cups (16 fl. oz./500 mL) ⅓ cup (2.5 fl. oz./75 mL) 4 cups (32 fl. oz./1 L) 2⁄3 cup (5 fl. oz./175 mL) 8 cups (64 fl. oz./1.9 L) 1⅓ cups (10 fl. oz./400 mL) The chart above is a guide for incorporating hard alcohol or spirits (35%+) only. When using the Spiked Slush preset, all premade inputs (wine, beer, seltzer, etc.) must have 2.8–16% alcohol.
TROUBLESHOOTING
WARNING: To reduce the risk of shock and unintended operation, turn the power off and unplug the appliance before troubleshooting.
Problem Possible Reason Solution You get an E1 error code. The Tank isn’t installed properly. 1. With the Locking Lever up, slide the Tank over the installed Auger and Cool Barrel.
2. Push down the Lock Lever all the way.
3. Press the Power Button to until you hear a beep and the preset illuminates. This indicates the appliance is ready to use.You get an E2 error code. There’s a temperature-sensing issue or short-circuit fault. Contact the Solution Center at (888) 687-2433 (United States) or (800) 342-2433 (Canada) for assistance. You get an E3 error code. The appliance is overheated. See the Resetting the Motor section. You get an E4 error code. It’s a low-sugar alert or motor-stop alert. 1. Turn the appliance off.
2. Check the sugar content of your recipe to confirm it contains at least 4% sugar.
3. If you’re using a premade beverage, check the ingredient list to ensure the sugar content is at least 4% and ensure the beverage doesn’t include artificial sweeteners. Refer to the Required Sugar Content section for more details.
4. If the recipe doesn’t meet the minimum sugar requirements, add 1–2 tablespoons (15–30 mL) of flavored syrup, juice, sugar, date sugar, coconut sugar, maple syrup, agave, simple syrup, or honey per serving and decrease the thickness to level 1.
5. Restart the appliance by pressing the Power Button. Then, select your preset and press the Power Button again to resume mixing your frozen drinks.
If the unit is overloaded, the motor will temporarily stall. If that happens, do this:
1. Unplug the appliance from the electrical outlet.
2. Allow the appliance to cool for approximately 15 minutes.
3. Remove the contents from the vessel.
4. Remove all parts and accessories while confirming no ingredients are jamming the Auger.
5. Plug the appliance in again and reassemble all parts. Then, turn on the appliance and resume your chosen preset.
DO NOT add frozen ingredients or ice to this appliance.You get an E5 error code. It’s a high-sugar alert or high-alcohol alert. 1. Check the alcohol content in your recipe to ensure it contains 2.8–16% alcohol.
2. If you’re using hard alcohol or spirits (35% +), use 4 oz. (125 g) of alcohol for every 24 oz. (680 g) of the total recipe size. Refer to the Sugar, Hard Alcohol & Spirit Guidelines for more details.
3. If a drink exceeds the maximum alcohol amount, add ¼ cup (60 mL) of water, soda, tonic water, seltzer, coffee or tea per serving to dilute the liquid input.
4. Restart the appliance by pressing the Power Button. Then, start your chosen preset again to continue creating your frozen drink.You get an E6 Error Code There’s a control printed circuit board or power board problem. Contact the Solution Center at (888) 687-2433 (United States) or (800) 342-2433 (Canada) for assistance. The slushie will not dispense when I pull on the Dispensing Spout. The nozzle is blocked. Press the cancel button and let the mix soften for about 5 minutes (or more) and then try dispensing again.
You can restart the cycle after if you want to keep your drink frozen for several more hours.GUARANTEE
- • Two-year guarantee for noncommercial use. Refer to our website or the sales receipt for details.
Guarantee
Use & Care
SAFETY AND USE INSTRUCTIONS
When using electrical appliances, basic safety precautions should always be following, including:
WARNING
- 1. Read all instructions.
- 2. This appliance is not intended for use by persons (including children) with reduced physical, sensory, or mental capabilities, or lack of experience and knowledge, unless they are closely supervised and instructed concerning use of the appliance by a person responsible for their safety. Close supervision is necessary when any appliance is used by or near children.
- 3. Children must be supervised to ensure that they DO NOT play with the appliance.
- 4. DANGER: There is a risk of fire or explosion due to flammable refrigerant. DO NOT puncture the refrigerant tubing. If you ever dispose of this product, do it in accordance with the applicable federal or local regulations pertaining to flammable refrigerant.
- 5. DO NOT operate unattended.
- 6. Avoid contact with moving parts. Keep your hands, hair, clothing, and utensils away from the moving parts to reduce risk of injury and/or damage to the appliance.
- 7. If the appliance, cord, or plug has been damaged in any manner, immediately discontinue use of the appliance. For any questions, call the Solution Center at (888) 687-2433 (United States) or (800) 342-2433 (Canada).
- 8. Unplug the appliance from outlet when not in use to prevent accidents (such as fire, electrical leakage, failure, etc.) and before cleaning, assembly, and disassembly.
- 9. DO NOT use the appliance for anything other than its intended use. This appliance is only intended for the preparation and serving of frozen beverages and soft serve. It’s not intended for use with any nonfood materials or products.
- 10. DO NOT let the cord hang over the edge of a table or counter.
- 11. DO NOT let the cord or unit touch hot surfaces.
- 12. DO NOT place the appliance or the cord on or near heat sources, a hot gas or electric burner, or in a heated oven.
- 13. DO NOT use outdoors.
- 14. DO NOT microwave the accessories included with this appliance.
- 15. WARNING: DO NOT use electrical appliances inside the compartments of the appliance, unless they are of the type recommended by the manufacturer.
- 16. DO NOT add hot ingredients to the appliance.
- 17. DO NOT submerge the appliance in water or other liquids.
- 18. DO NOT fill the container beyond the maximum fill lines. See p. 7 for more details.
- 19. Before operating, ensure all the utensils are removed from the containers. Failure to remove the utensils can cause the containers to shatter and potentially result in personal injury and property damage. Confirm only the Auger is in the Tank and properly installed before use. See the Assembly section for more details.
20. DO NOT carry the appliance by the Lock Lever or Cool Barrel as they may break. Instead, hold the appliance by grabbing both sides underneath the base. - 21. DO NOT use with hard, loose ingredients or ice. This appliance is not intended to process loose frozen fruit, a block of solid ice, ice cubes, or any solids.
- 22. DO NOT operate the appliance on an unstable or wet surface. Always operate the appliance on a dry, stable, non-combustible, level surface.
23. When handling the appliance, DO NOT turn it upside down or on its side. You must always keep it upright. 24. When in use, DO NOT place the appliance against a wall, cabinet, or against other appliances. Leave at least 6" (15 cm) of free space on the back and sides of the appliance. Do not store any item on top of the appliance. 25. DO NOT put foreign objects into gaps and crevices of the appliance. DO NOT insert utensils or other foreign matter into gaps or crevices. This may cause electric shock or other dangerous accidents. - 26. If the freezing solution appears to be leaking from the appliance, stop using the appliance immediately.
- 27. WARNING: Keep ventilation openings (see parts diagram below), in the appliance enclosure or in the built-in structure, clear of obstruction. Doing so may damage the appliance and/or cause it to overheat.
- 28. The use of accessory attachments not recommended by Pampered Chef may cause injuries.
- 29. Make sure the appliance is fully assembled before plugging in and pressing the Power Button. See the Assembly section for more details.
- 30. WARNING: DO NOT use any mechanical devices or other means to accelerate the defrosting process, other than those recommended by the manufacturer.
- 31. DO NOT store explosive substances such as aerosol cans with a flammable propellant in or near the appliance.
- 32. DO NOT move the appliance while its operating. The appliance must be unplugged and emptied before moving.
- 33. DO NOT prefreeze the ingredients. All ingredients should be no lower than 34°F (1°C) as frozen ingredients may cause the Auger to stall.
- 34. WARNING: DO NOT damage the refrigerant circuit. This warning is only applicable for appliances with refrigerating circuits which are accessible by the user.
- 35. This appliance contains an insulation blowing gas. When disposing this appliance, it must be disposed in accordance with local regulations.
- 36. WARNING: When positioning the appliance, ensure the supply cord is not trapped or damaged.
- 37. WARNING: DO NOT locate multiple portable socket-outlets or portable power supplies at the rear of the appliance.
SAFEGUARDS
- 1. This appliance is intended to be used in household and similar applications such as
- a.staff kitchen areas in shops, offices and other working environments;
- b. farm houses and by clients in hotels, motels and other residential type environments;
- c. bed and breakfast type environments;
- d. catering and similar non-retail applications.
2. Clean frequently. Refer to the Cleaning section for proper maintenance. - 3. Be sure the outlet is designated for just this appliance and has nothing else plugged into it.
- 4. Never connect this unit to an external timer switch, smart plug, or separate remote-control system.
- 5. DO NOT store the unit in direct sunlight.
- 6. DO NOT operate the appliance adjacent to or inside sinks and other sources of water.
- 7. Position the appliance away from any overhangs, walls, and table or countertop edges.
- 8. DO NOT insert or remove the plug with wet hands. To avoid injuries due to electric shock, make sure your hands are dry before plugging and unplugging the unit.
- 9. DO NOT interact with the appliance with wet hands.
- 10. DO NOT use an adapter, extension cord, or inverter with this appliance.
- 11. WARNING: Use and clean with safe drinking water only.
- 12. Using any high-acidic foods or foods with dyes/food colorings may cause staining. This is considered normal and doesn’t affect the appliance’s performance.
ELECTRICAL HAZARDS
When using electrical appliances, basic safety precautions should always be followed including the following:
'1. To reduce the risk of electric shock, this plug will fit in a polarized outlet only one way. If the plug doesn’t fit fully into the outlet, contact a qualified electrician. - 2. Use only with a 120V 60Hz power outlet with a minimum current rating of 15A. Failure to follow can result in electrical shock, fire, or other serious injury.
- 3. To protect against electrical shock, do not immerse the cord, plug, or any part of the unit in water or other liquids. DO NOT pour water on its side or control panel.
- 4. A short power-supply cord is provided to reduce risks resulting from becoming entangled in or tripping over a long cord.
- 5. To disconnect, turn the power off by pressing and holding the Power Button. Then, remove the plug from the wall outlet. Always pull the plug out from the wall; never pull the cord.
- 6. This appliance has important markings on the plug. The entire supply cord isn’t suitable for replacement. If damaged, call the Solution Center at (888) 687-2433 (United States) or (800) 342-2433 (Canada).
- 7. If the plug fits loosely into the outlet, or if the outlet or plug feels warm, DO NOT use that outlet.
ENVIRONMENTAL HAZARDS
- 1. This appliance uses flammable refrigerants. When disposing of this appliance the end of its life, it MUST be recycled separately from other domestic waste.
- 2. It should be disposed of at a selective collection center for electrical and/or electronic appliances. As the user, you’re responsible for taking the appliance to the appropriate collection center.
- 3. For more detailed information about available collection systems, contact your local waste collection organization.
PARTS
A. Filling Chute
B. Tank
C. Dispensing Handle
D. Dispensing SpoutE. Condensation Tray
F. Auger
G. Cool Barrel
H. WellI. Drip Tray Cover and Drip Tray
J. Lock Lever
K. VentsL. Control Panel
M. Soft-Serve TipDISPLAY CONTROL PANEL DISPLAY & OPERATING BUTTONS 1. Power Button: Press to turn the appliance on. Press and hold to turn the appliance off.
2. Presets: Choose from a selection of presets to achieve the perfect temperature and thickness for your frozen creations.
3. Wash Preset: This rinses the appliance without cooling. For a deeper clean, add a small amount of dish soap directly to the water.
4. Thickness Setting: Easily adjust the thickness for your perfect frozen concoction. Press the minus button to decrease the thickness of your frozen drink or press the plus button to increase the thickness of your frozen drink.
5. Cancel Button: Press any time to cancel functions. The screen will default to the Wash preset.
6. Arrow Button: Press to cycle through the different presets.PRESETS
Preset Default Thickness Ideal Capacity
(The thickness level is indicated by the number of bars.)Products to Avoid Using
Note: The following ingredients won’t generate your desired consistency.Soft Serve 12 bars 30 fl. oz. (875 mL) Water Slushie 6 bars 16–64 fl. oz.
(500 mL–1.9 L)Diet sodas, seltzers, and water Spiked Slush 8 bars 16–64 fl. oz.
(500 mL–1.9 L)Pure alcohol, low-sugar or sugar-free cocktails, and water Frappe 4 bars 16–64 fl. oz.
(500 mL–1.9 L)Black coffee, unsweetened coffee, and water Milkshake 4 bars 16–64 fl. oz.
(500 mL–1.9 L)Yogurt drinks, protein drinks, and water Frozen Juice 6 bars 16–64 fl. oz.
(500 mL–1.9 L)Sugar-free drinks and water Chilled Drink 1 bar 16–64 fl. oz.
(500 mL–1.9 L)Wash — 64 fl. oz. (1.9 L) Abrasive cleaners CLEANING
- 1. Clean the appliance thoroughly before and after using it.
- 2. If you’re not using the Wash cycle, you should dispense all the contents. Then, turn the appliance off, unplug it, and disassemble it before cleaning. If you’re using the Wash cycle, refer to the Using the Wash Preset section.
- 3. The Tank, Auger, Condensation Tray, Soft-Serve Tip, Drip Tray, and Drip Tray Cover are dishwasher-safe.
4. Wipe the Cool Barrel and the Well underneath it with a damp cloth. Note: You may need to use a paper towel to soak up any remaining liquid in the Well. - 5. Dry the appliance thoroughly before using or storing it.
- 6. DO NOT use abrasive cleaners like steel wool, scouring powders, or other abrasive materials.
Using the Wash Preset:
This cycle washes the appliance. After using this cycle, you can wash all parts by hand or in the dishwasher to fully clean all parts after every use. For best results, use the wash cycle before disassembling and cleaning all parts.
- 1. Dispense all the remaining frozen drink or soft serve into a container.
- 2. Press the Cancel Button to stop the current preset. The appliance will then default to the Wash preset.
- 3. Add water until it reaches the max fill line (64 oz./1.9 L).
- 4. Press the Power Button to start the Wash preset.
- 5. Allow the water to cycle through until the Tank looks thoroughly rinsed.
- 6. Place a large bowl under the Dispensing Spout. Slowly dispense the water from the appliance into the bowl. Note: Water will come out quickly, so hold the bowl up to the spout or use the Soft-Serve Tip to slow the flow rate of the water.
- 7. Repeat the process if the Tank doesn’t look thoroughly rinsed.
- 8. Press and hold the Power Button to turn the appliance off.
Storing:
- 1. Allow all parts to dry thoroughly before reassembling and/or storing the unit.
- 2. DO NOT wrap the cord around the bottom of the base. Instead, store the unit upright and with all parts fully assembled. Then, bundle the cord and secure it with the included hook and loop fastener.
3. When moving the appliance, lift the appliance by grabbing both sides underneath the base. DO NOT lift or carry the appliance by the Lock Lever or Cool Barrel as they may break. - 4. DO NOT store ingredients inside the Tank.
USE AND CARE
IMPORTANT BEFORE USE
- Before first use:
- • Remove all packaging. Make sure all parts are present and accounted for.
- • Read all instructions in this document.
- • Clean all parts. See the Cleaning section for instructions.
- • Place the unit on a counter for at least 2 hours before operating. This allows the refrigerant to settle for safe use and optimal results.
- • For any questions, call the Solution Center at (888) 687-2433 (United States) or (800) 342-2433 (Canada).
INITIAL TEST RUN
- 1. Assemble the appliance by following the Assembly and Use sections below.
- 2. Insert the plug into a power outlet.
- 3. Press the Power Button to turn the appliance on.
- 4. Use the Arrow Button to scroll until the Wash preset flashes.
- 5. Use the Filling Chute to add 64 oz. (1.9 L) of water to the Tank.
- 6. Press the Power Button to start the Wash preset.
- 7. After 2 minutes, press the Cancel Button to stop the Wash preset.
- 8. Place a large bowl under the Dispensing Nozzle and use the Dispensing Handle to dispense the water.
- Note:
- • You’ll need a minimum of 16 oz. (500 mL) of liquid to use the appliance except for the Soft Serve preset.
- • You can add up to 64 oz. (1.9 L) of liquid for any preset except the Soft Serve preset. Note: Refer to Pampered Chef recommended recipes for this setting.
- • The ideal liquid capacity when using the Soft Serve preset is 30 oz. (875 mL).
- • DO NOT add ice or solid ingredients like fruit, ice cream, or frozen fruit to the appliance.
- • DO NOT add hot ingredients to the appliance.
- • WARNING: Review all warnings at the beginning of this use and care before proceeding. Failure to follow safety information may result in serious injury or property damage.
How to Assemble and Use:
1. Install the Auger by sliding it over the Cool Barrel and turning it until it fits into place and onto the pin in front. 2. With the Dispensing Handle facing you, attach the Condensation Tray by aligning the notches on the Tank with the slots on the Condensation Tray. Slide the Condensation Tray toward you until it’s secure. 3. With the Lock Lever up, slide the vessel over the previously installed Auger and Cool Barrel. Then, push the Tank into place by putting one hand on the back of the appliance and the other on the front of the Tank. 4. Push down the Lock Lever all the way. 5. Place the Drip Tray Cover on top of the Drip Tray and insert the Drip Tray into the front of the appliance until it clicks into place. 6. Plug the appliance in. 7. If you’re making soft serve, add the Soft-Serve Tip by aligning the notches of the Soft-Serve Tip with the slots on the Dispensing Spout. Then, push up and turn it counterclockwise until it’s in place. 8. Turn the appliance on by pressing the Power Button. Then, scroll to your desired preset with the Arrow Button. Press the Power Button again to start your chosen preset. 9. Once the Auger starts moving, pour your liquid into the Tank with the Filling Chute. Close the chute when you’re done. 10. When your frozen drink or soft-serve mixture is done, the unit will beep and the display will read, “End.” 11. Place a container under the Dispensing Spout and pull the Dispensing Handle to dispense. Note:
- • The appliance will continue to run after a cycle finishes to keep your frozen drink at the ideal temperature, so it’s always ready to dispense. To prevent your mixture from overfilling, dispense frequently.
- • It can take 15–60 minutes to make your frozen drink or soft serve depending on the preset, ingredients, liquids, and temperature. Smaller servings will slush faster than larger servings.
- • The appliance will continue to run for up to 12 hours except when you’re using the Wash preset. After it’s been running for 12 hours, it will beep and automatically shut off.
How to Disassemble:
1. Before disassembling, use the Dispensing Spout to empty all the remaining contents from the Tank into another container. 2. Turn the appliance off by pressing and holding the Power Button. Then, remove the plug from the power outlet. 3. Unlock the Tank by lifting up on the Lock Lever and gently removing it from the appliance. Tip the Tank downward to prevent any remaining liquid from spilling out the back of the Tank. 4. Remove the Condensation Tray from the Tank by holding the Tank with the Dispensing Spout facing away from you. Then, slide the Condensation Tray toward you. 5. Slide the Auger off the Cool Barrel. 6. Remove the Drip Tray by sliding it out from under the appliance. Then, remove the Drip Tray Cover by lifting it off the Drip Tray. 7. Wipe the Cool Barrel and the Well underneath it with a damp cloth. Note: You may need to use a paper towel to soak up any remaining liquid in the Well. 8. See the Cleaning section for more info. Helpful Tips:
- • Premixed ingredients will taste sweeter. However, once the mixture reaches the desired thickness and temperature, it’ll taste less sweet.
- • Recipes must include at least 4% sugar without artificial sweeteners. DO NOT use diet sodas. They won’t achieve the desired consistency.
- • When using the Spiked Slush preset, all premade liquids must contain 2.8–16% alcohol.
- • For best results, chill the liquid(s) or blended ingredients before adding it to the appliance.
- • For the frostiest results, chill serving glasses before dispensing your frozen drinks in them.
- • Use the minus and plus buttons to adjust the thickness of your frozen drink to your preference.
- • When using the Milkshake or Frappe preset, dispense contents within 30 minutes of the preset ending to avoid a foamy output.
- • For the best dispensing experience, fill the Tank to the recommended fill line for the preset you’re using.
- • For best results, enjoy your frozen drink immediately after the cycle ends.
- • Use whole milk for the best soft-serve results.
Resetting the Motor:
- Resetting the Motor: 1. This appliance features a unique safety system that prevents damage to the appliance should it inadvertently become overloaded. If the appliance is overloaded, the motor will become temporarily disabled. Follow this reset procedure:
- a. Unplug the appliance from the electrical output.
- b. Allow the appliance to cool for approximately 15 minutes. c. Dispense all contents.
- d. Remove all parts and accessories.
- e. Ensure no ingredients are jamming the Auger.
- 2. IMPORTANT: Ensure the maximum capacity is not exceeded. This is the most typical way for an overload to occur.
- a. DO NOT use the appliance to process a solid block of ice or ice cubes.
- b. DO NOT use the appliance to make a smoothie or process hard, loose ingredients.
SUGAR GUIDELINES
When using this appliance, refer to the drink/liquid nutrition label to ensure the sugar content meets the recommended guidelines below.
Serving Size Minimum Total Sugar Amount 8 fl. oz. (250 mL) 8g 12 fl. oz. (375 mL) 11 g 20 fl. oz. (600 mL) 18 g Follow this rule: For every 8 ounces of liquid, you’ll need roughly 8 grams of sugar.
- Note:
- • Prefrozen ingredients will taste sweeter. However, once the mixture reaches the desired thickness and temperature, it’ll taste less sweet.
- • Not enough sugar or too much alcohol will prevent your drink from freezing or slushing. For that reason, all mixes must contain at least 4% sugar to achieve the desired results
IMAGE
- • Sugar-free substitutes and artificial sweeteners won’t aid in meeting the total necessary sugar requirements.
HARD ALCOHOL & SPIRIT GUIDELINES
When making frozen cocktails, refer to this chart for the maximum hard alcohol/spirit content for total recipe size.
Serving Size Maximum Alcohol Amount 2 cups (16 fl. oz./500 mL) ⅓ cup (2.5 fl. oz./75 mL) 4 cups (32 fl. oz./1 L) 2⁄3 cup (5 fl. oz./175 mL) 8 cups (64 fl. oz./1.9 L) 1⅓ cups (10 fl. oz./400 mL) The chart above is a guide for incorporating hard alcohol or spirits (35%+) only. When using the Spiked Slush preset, all premade inputs (wine, beer, seltzer, etc.) must have 2.8–16% alcohol.
TROUBLESHOOTING
WARNING: To reduce the risk of shock and unintended operation, turn the power off and unplug the appliance before troubleshooting.
Problem Possible Reason Solution You get an E1 error code. The Tank isn’t installed properly. 1. With the Locking Lever up, slide the Tank over the installed Auger and Cool Barrel.
2. Push down the Lock Lever all the way.
3. Press the Power Button to until you hear a beep and the preset illuminates. This indicates the appliance is ready to use.You get an E2 error code. There’s a temperature-sensing issue or short-circuit fault. Contact the Solution Center at (888) 687-2433 (United States) or (800) 342-2433 (Canada) for assistance. You get an E3 error code. The appliance is overheated. See the Resetting the Motor section. You get an E4 error code. It’s a low-sugar alert or motor-stop alert. 1. Turn the appliance off.
2. Check the sugar content of your recipe to confirm it contains at least 4% sugar.
3. If you’re using a premade beverage, check the ingredient list to ensure the sugar content is at least 4% and ensure the beverage doesn’t include artificial sweeteners. Refer to the Required Sugar Content section for more details.
4. If the recipe doesn’t meet the minimum sugar requirements, add 1–2 tablespoons (15–30 mL) of flavored syrup, juice, sugar, date sugar, coconut sugar, maple syrup, agave, simple syrup, or honey per serving and decrease the thickness to level 1.
5. Restart the appliance by pressing the Power Button. Then, select your preset and press the Power Button again to resume mixing your frozen drinks.
If the unit is overloaded, the motor will temporarily stall. If that happens, do this:
1. Unplug the appliance from the electrical outlet.
2. Allow the appliance to cool for approximately 15 minutes.
3. Remove the contents from the vessel.
4. Remove all parts and accessories while confirming no ingredients are jamming the Auger.
5. Plug the appliance in again and reassemble all parts. Then, turn on the appliance and resume your chosen preset.
DO NOT add frozen ingredients or ice to this appliance.You get an E5 error code. It’s a high-sugar alert or high-alcohol alert. 1. Check the alcohol content in your recipe to ensure it contains 2.8–16% alcohol.
2. If you’re using hard alcohol or spirits (35% +), use 4 oz. (125 g) of alcohol for every 24 oz. (680 g) of the total recipe size. Refer to the Sugar, Hard Alcohol & Spirit Guidelines for more details.
3. If a drink exceeds the maximum alcohol amount, add ¼ cup (60 mL) of water, soda, tonic water, seltzer, coffee or tea per serving to dilute the liquid input.
4. Restart the appliance by pressing the Power Button. Then, start your chosen preset again to continue creating your frozen drink.You get an E6 Error Code There’s a control printed circuit board or power board problem. Contact the Solution Center at (888) 687-2433 (United States) or (800) 342-2433 (Canada) for assistance. The slushie will not dispense when I pull on the Dispensing Spout. The nozzle is blocked. Press the cancel button and let the mix soften for about 5 minutes (or more) and then try dispensing again.
You can restart the cycle after if you want to keep your drink frozen for several more hours.GUARANTEE
- • Two-year guarantee for noncommercial use. Refer to our website or the sales receipt for details.
Guarantee


