

 Canada (en)
 Germany (de)
 Austria (de)
 France (fr)


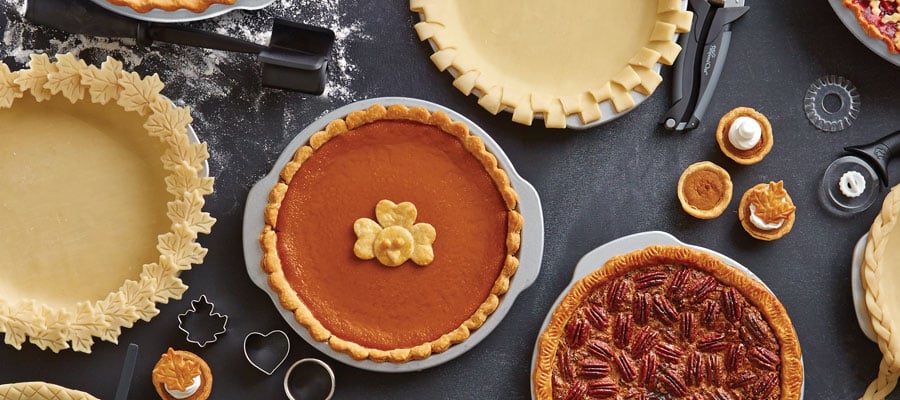
8 Creative Pie Crust Designs
Make a good pie a great one! Just try any of these quick tips using kitchen utensils for transforming your pie crusts into a statement-making work of culinary art. Oh, the pie-ssibilities!
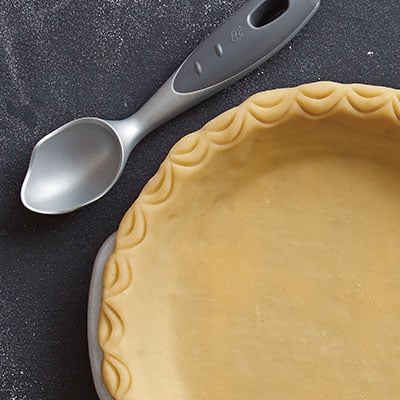
1. Simply Scalloped
Who knew creating such an elegant look was so simple? Arrange your crust into a pie pan and trim off excess, and then use the Ice Cream Scoop to press a scalloped design around the rim. Brush with an egg wash to enhance the detail before baking. Simple, easy, beautiful!
Tool to use: Ice Cream Scoop
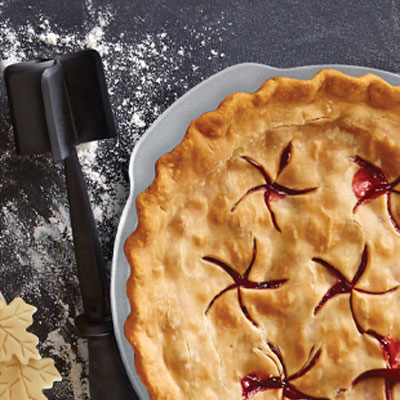
2. Whimsical Pinwheels
Create a pinwheel design by laying dough on a Pastry Mat and pressing down with the Mix 'N Chop. Make as many or as few pinwheels as you want! Arrange over a filled pie, fold under excess crust and pinch closed.
Tools to use: Pastry Mat and Mix ‘N Chop
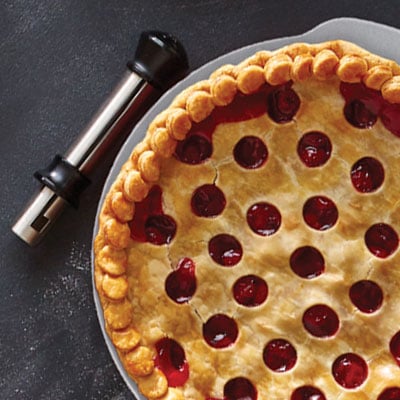
3. Pretty Polka Dots
Take your pie to the next level of cute! Lay dough on a Pastry Mat and punch out about 40 circles with The Corer™, leaving 1–1½" around the edge intact. Arrange over a filled pie, fold under excess crust and pinch closed. Brush with egg wash or a bit of water along the rim then attach the circle cutouts, slightly overlapping each one.
Tool to use: The Corer™
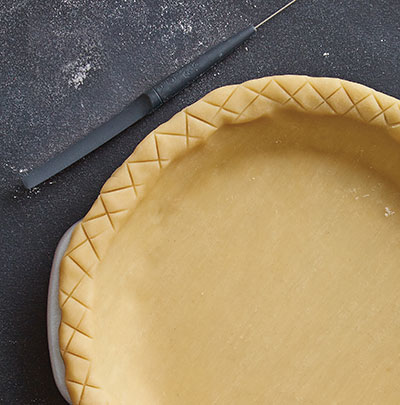
4. “X” Marks the Spot
When quick, easy and creative is what you want, this is the technique for you. Simply press dough into your pie pan, trim off any excess, and score “X” shapes around the rim using the releasing end of the Cake Tester & Releaser. Brush with an egg wash before baking to enhance the detail.
Tool to use: Cake Tester & Releaser
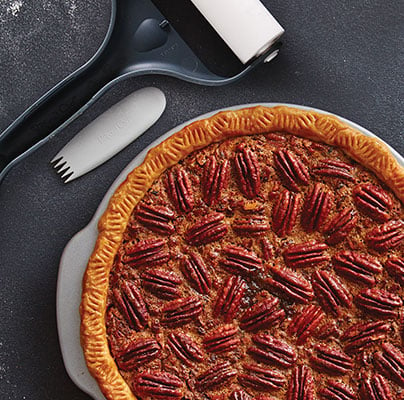
5. Rustic Elegance
Imprints from the Baker’s Roller® tool make even a store-bought pie crust look rustic and deliciously homemade. Arrange your crust into a pie pan and trim off excess. Press the teeth of the tool down around the rim, tilting it in alternating directions to create a slight zigzag pattern. Brush with egg wash before you bake to enhance the detail.
Tool to use: Baker’s Roller
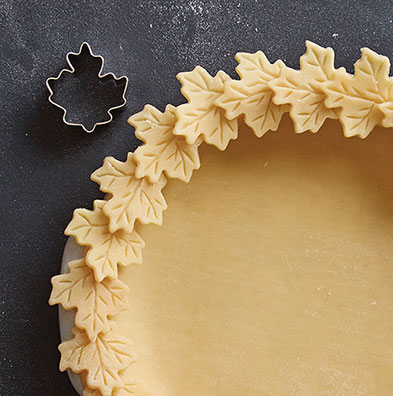
6. Falling Leaves
You’ll fall in love with this design! Lay dough on a Pastry Mat and cut out about 24 leaves with the leaf Creative Cutter. You can use the releasing end of the Cake Tester & Releaser to create the design detail on the leaves. Press your crust into a pie pan and line the rim with the cutouts, attaching with egg wash or a bit of water. Brush with egg wash before baking to enhance the leaf detail.
Tip: Place a Sheet Pan under the pie while baking to avoid breaking any leaves when you take it out of the oven.
Tool to use: Creative Cutter Set
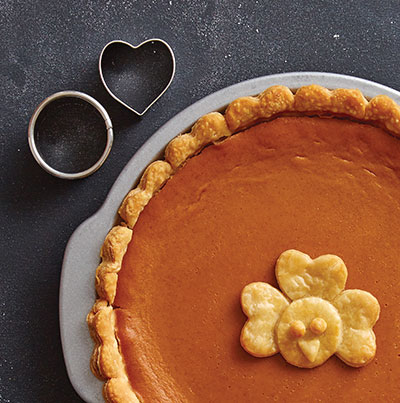
7. Gobble, Gobble
Give your pie a fun seasonal flourish with a pie crust turkey! Lay dough on a Pastry Mat and cut out three hearts with the heart Creative Cutter. Cut out a circle with the 1½" Biscuit Cutter. Use scraps for the face, attaching with an egg wash or water. For the crust, arrange pie dough into your pan, making sure it comes up the edges. Cut out around the rim using the heart Creative Cutter. The crust will bake down to form a scalloped look. When the pie is in its last 15 minutes of baking, arrange the turkey as shown and return it to the oven to finish.
Tools to use: Creative Cutter Set and Biscuit Cutter Set
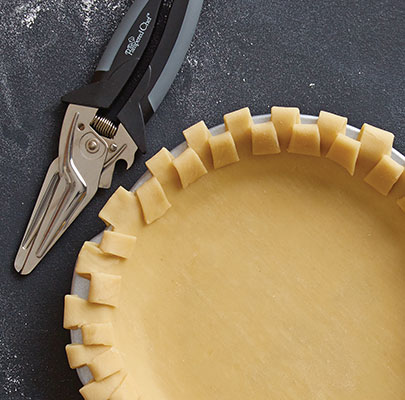
8. Modern Checkerboard Design
Press dough in a Pie Plate and, using the Professional Shears, snip around it in ½" increments. Alternately fold every other piece toward the center, then tuck the remaining dough squares underneath for a clean edge.
Tool to use: Professional Shears


